
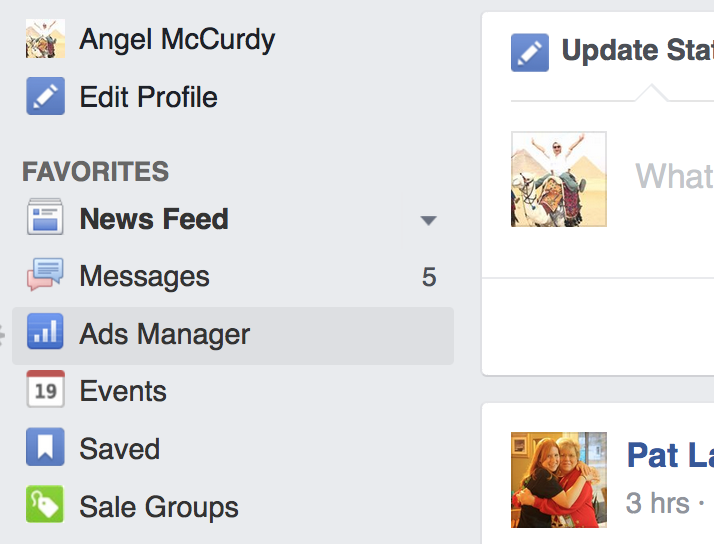
Log into your personal Facebook account and select “Ads Manager”.
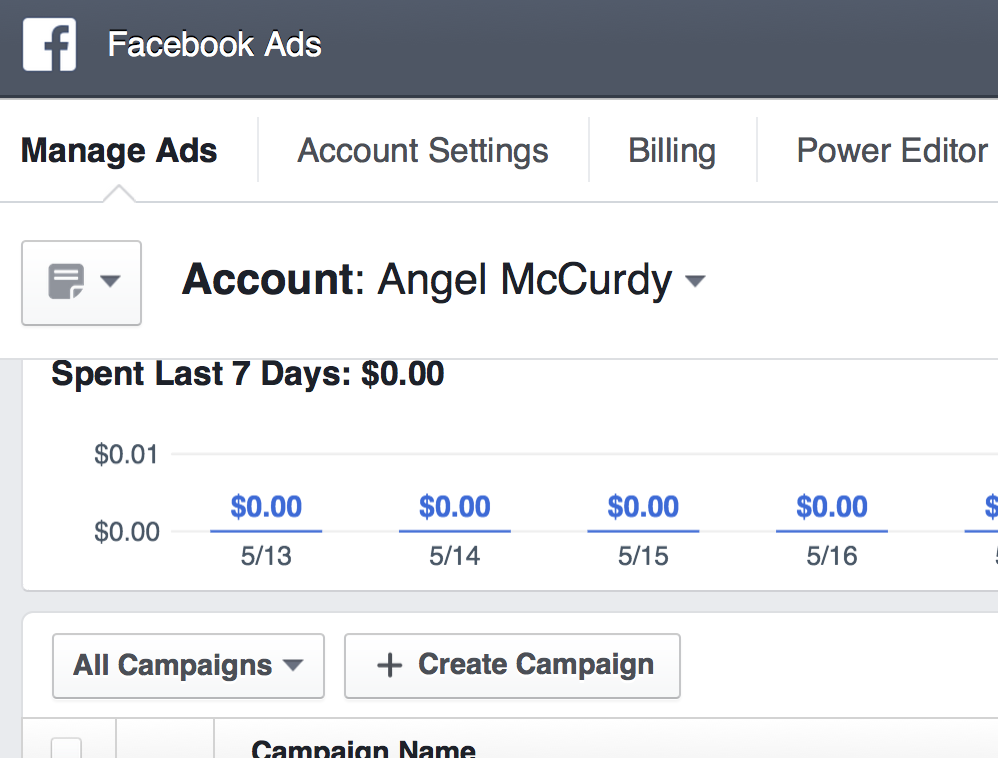
Once you click on “Ads Manager” you will be taken to your Facebook Ads page. Here you can manage existing ads, your account settings, billing and you have access to Power Editor and other tools like Audience Insights.

First you need to choose an objective for your ad. Go to “Create Campaign” and it will bring you to the campaign creation page.
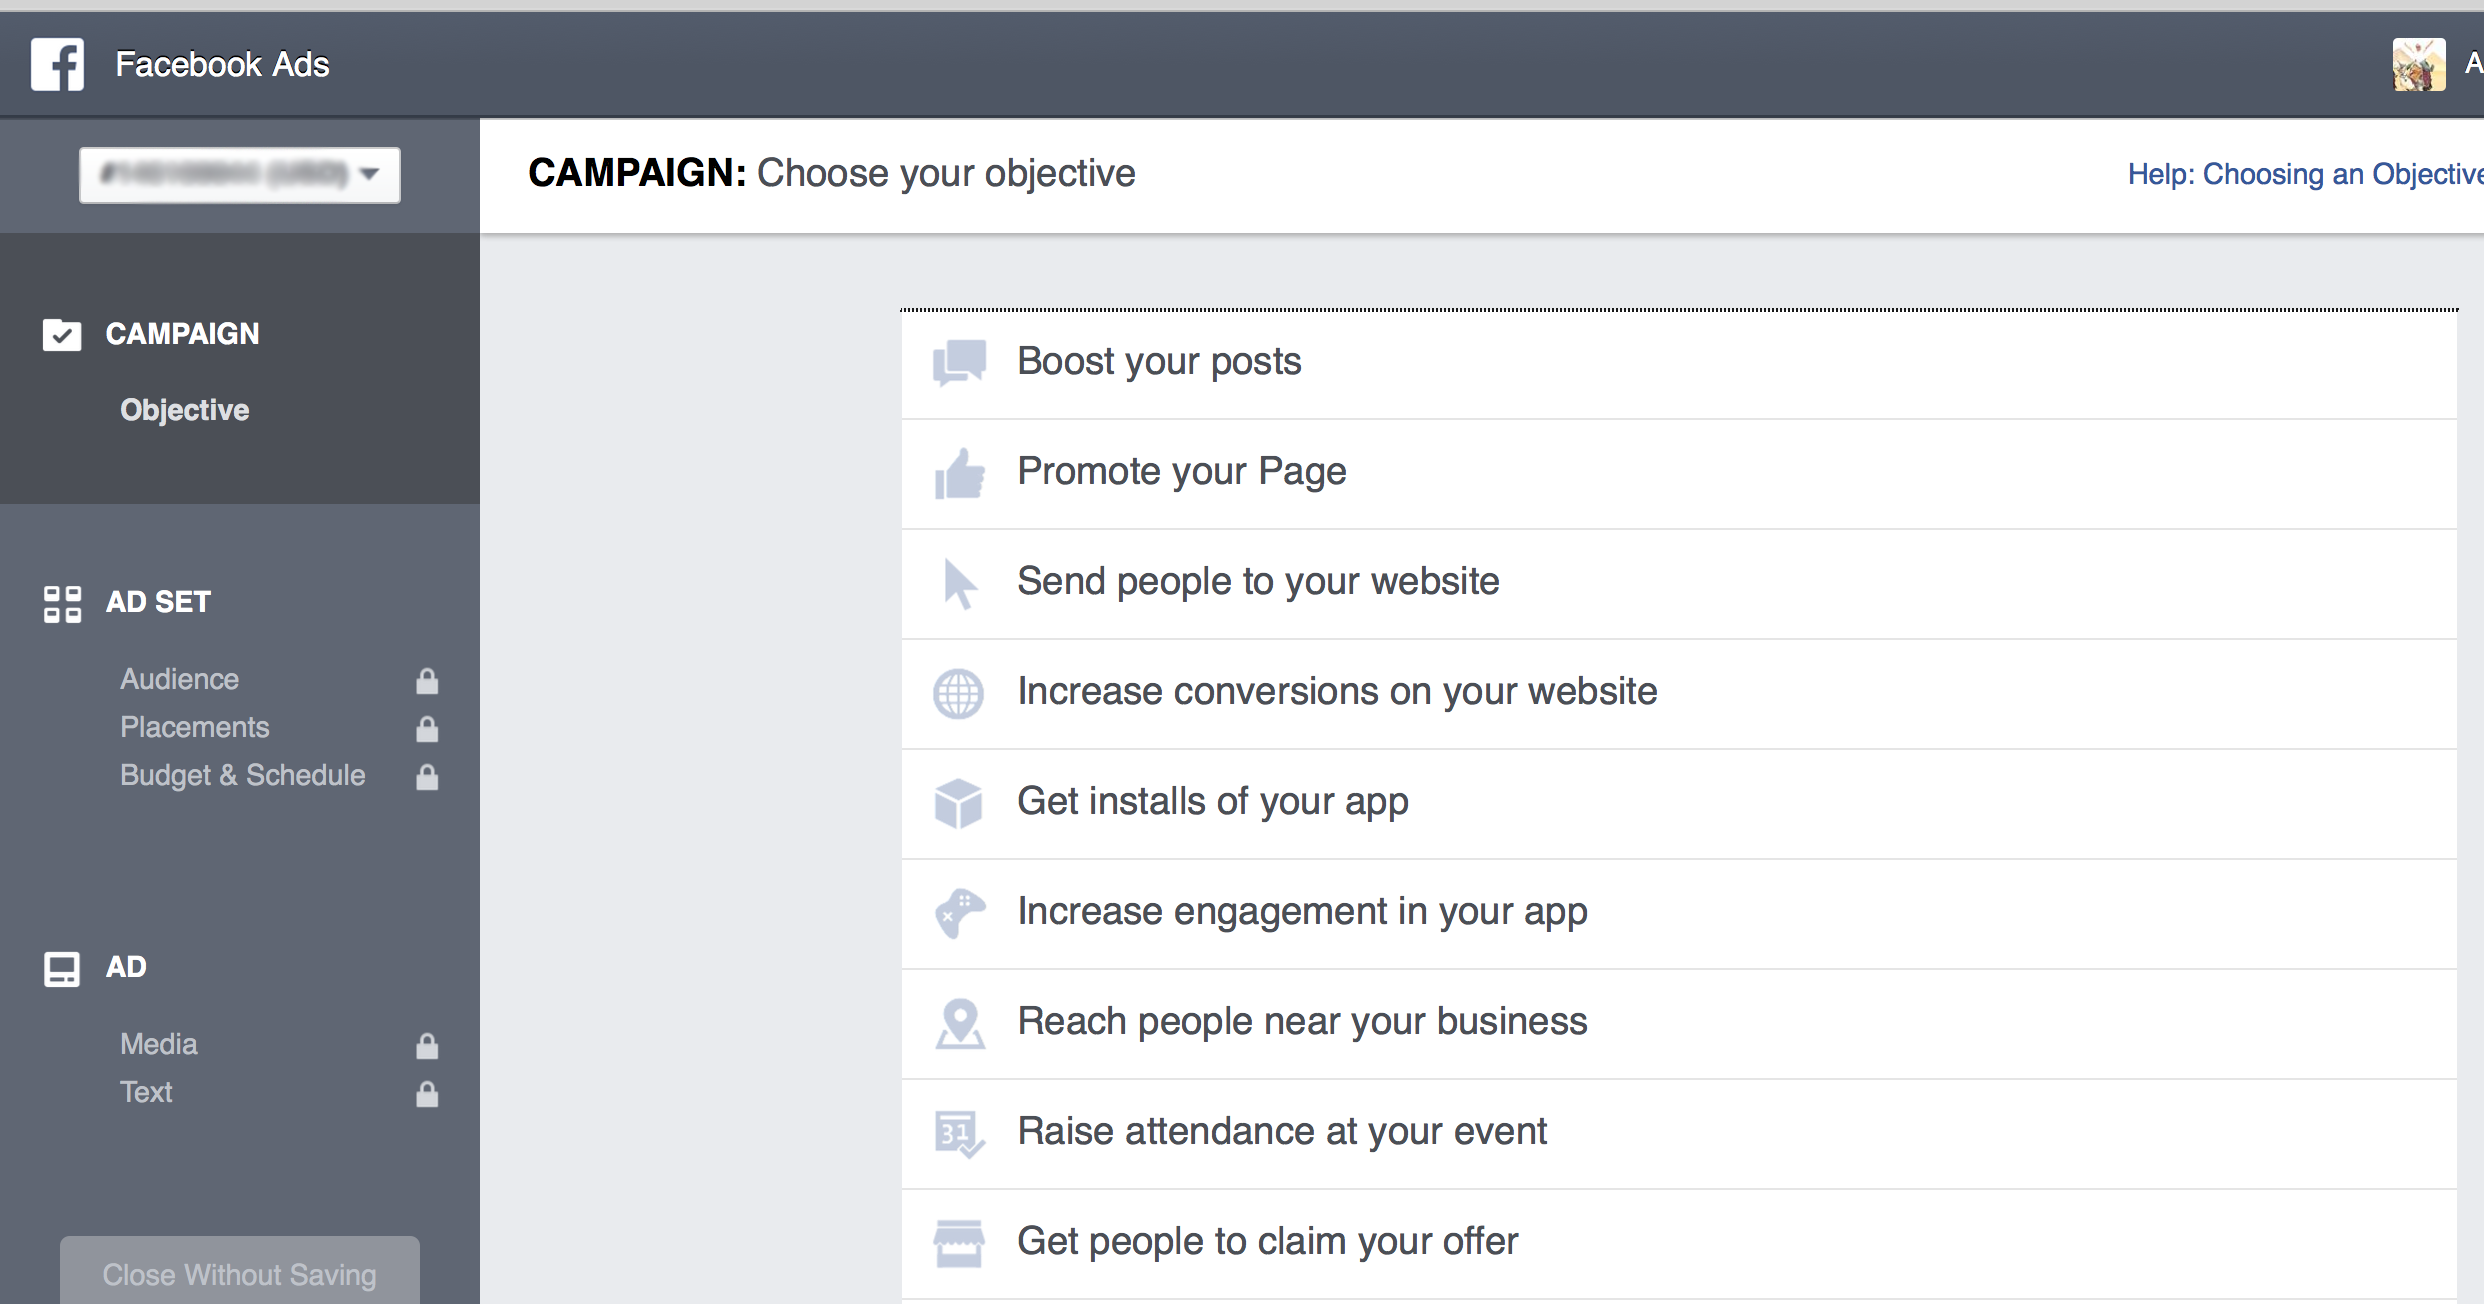
Now you have to decide what your objective is. Are you wanting to publicize a particular post on your Fan Page? Do you want to send people to your website? What works with the campaign you are promoting online? Do you want to call people to action through a video?
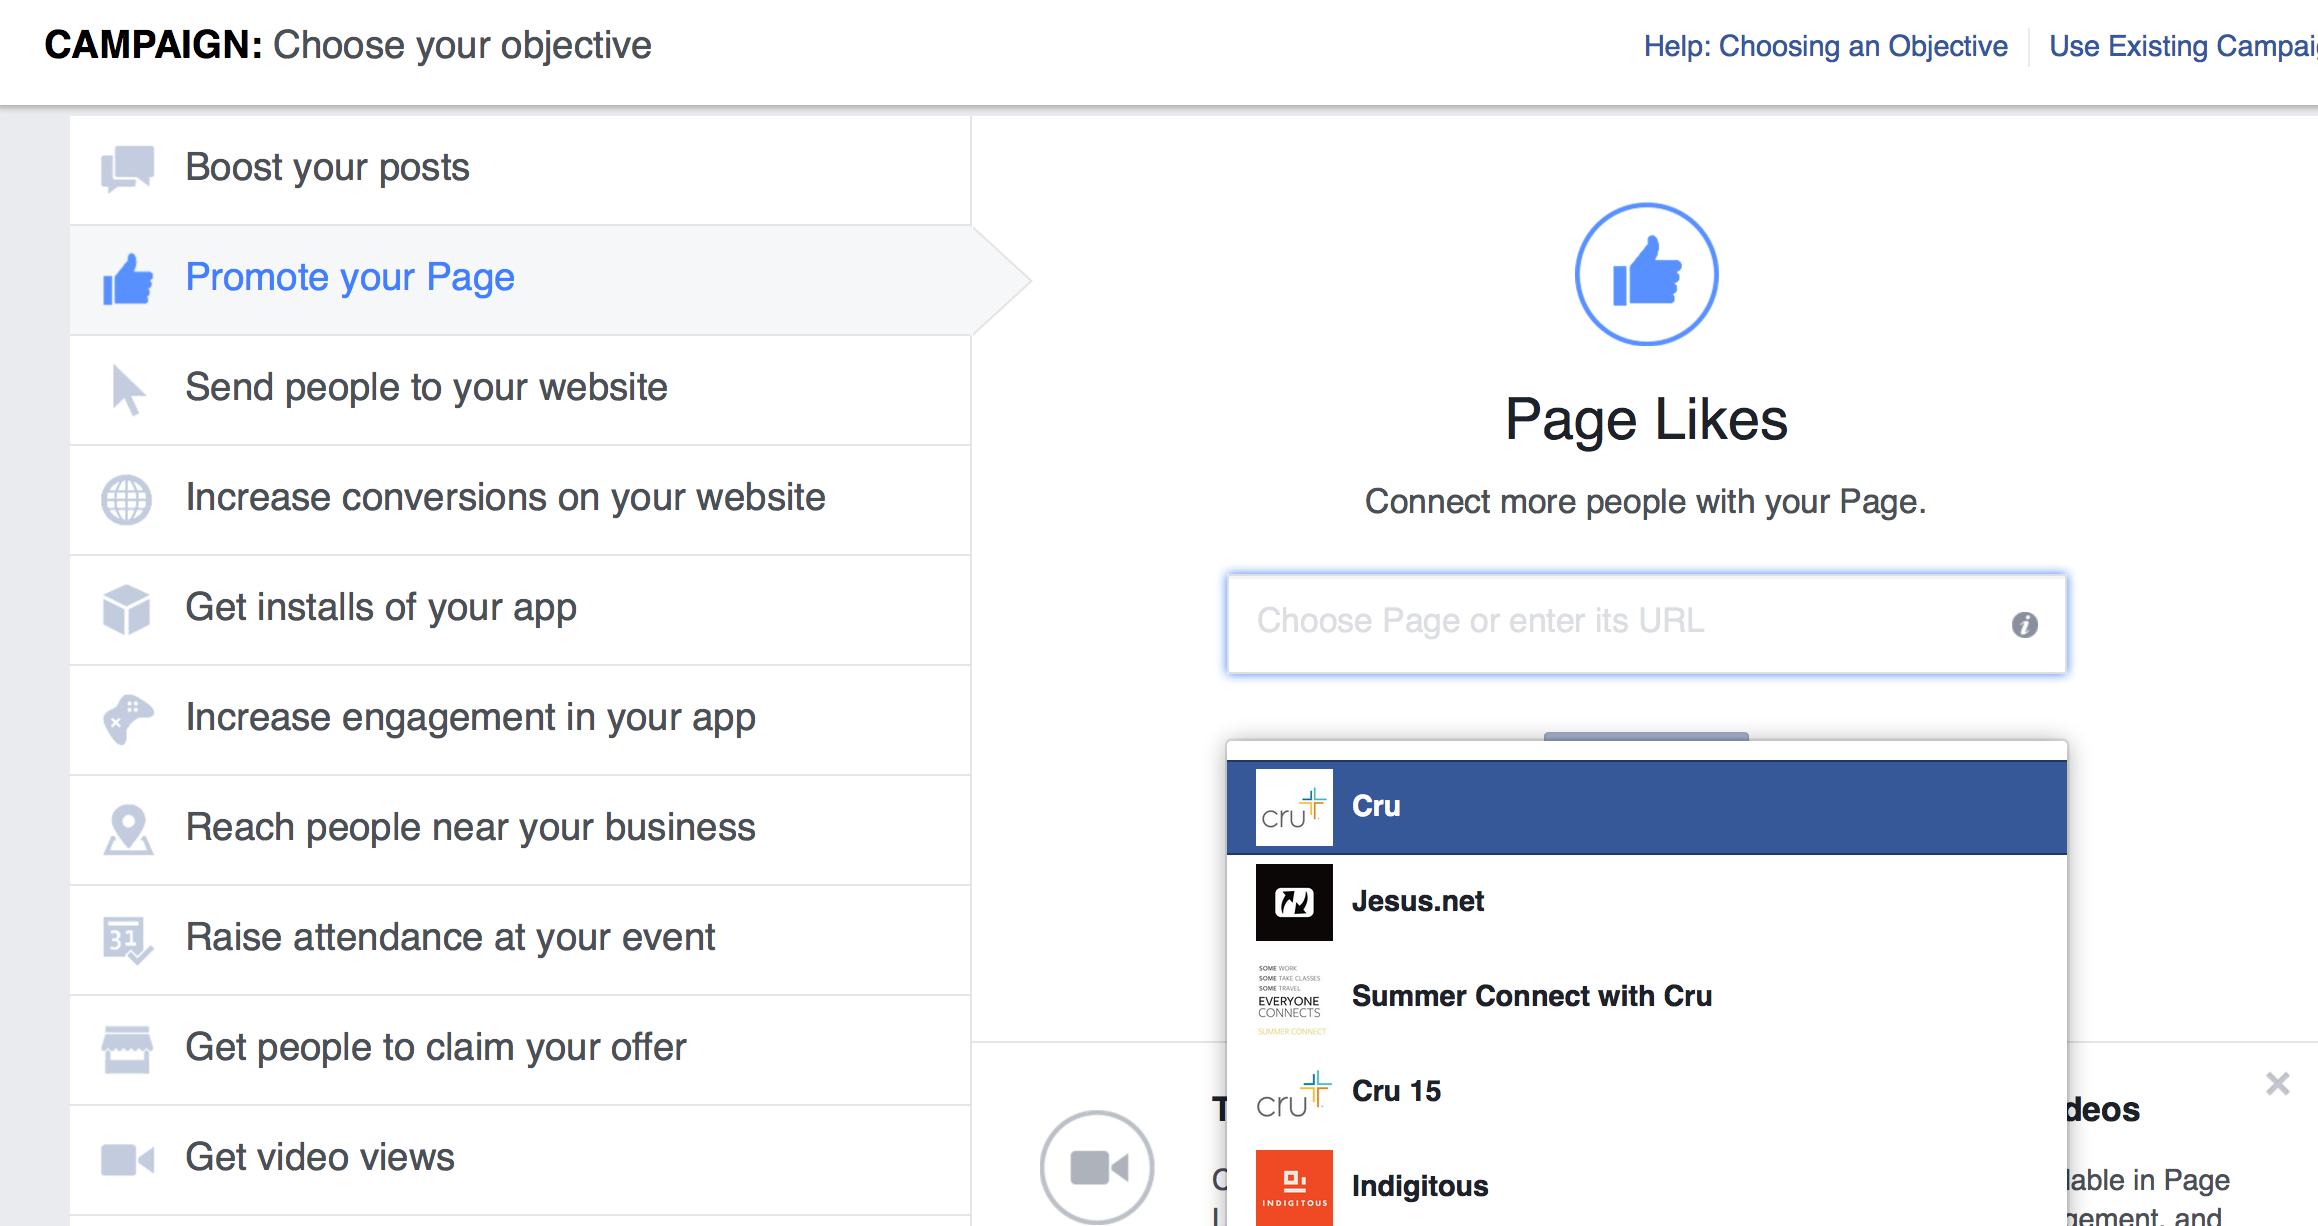
You will be prompted to take the next steps by Ads Manager based on your selection.
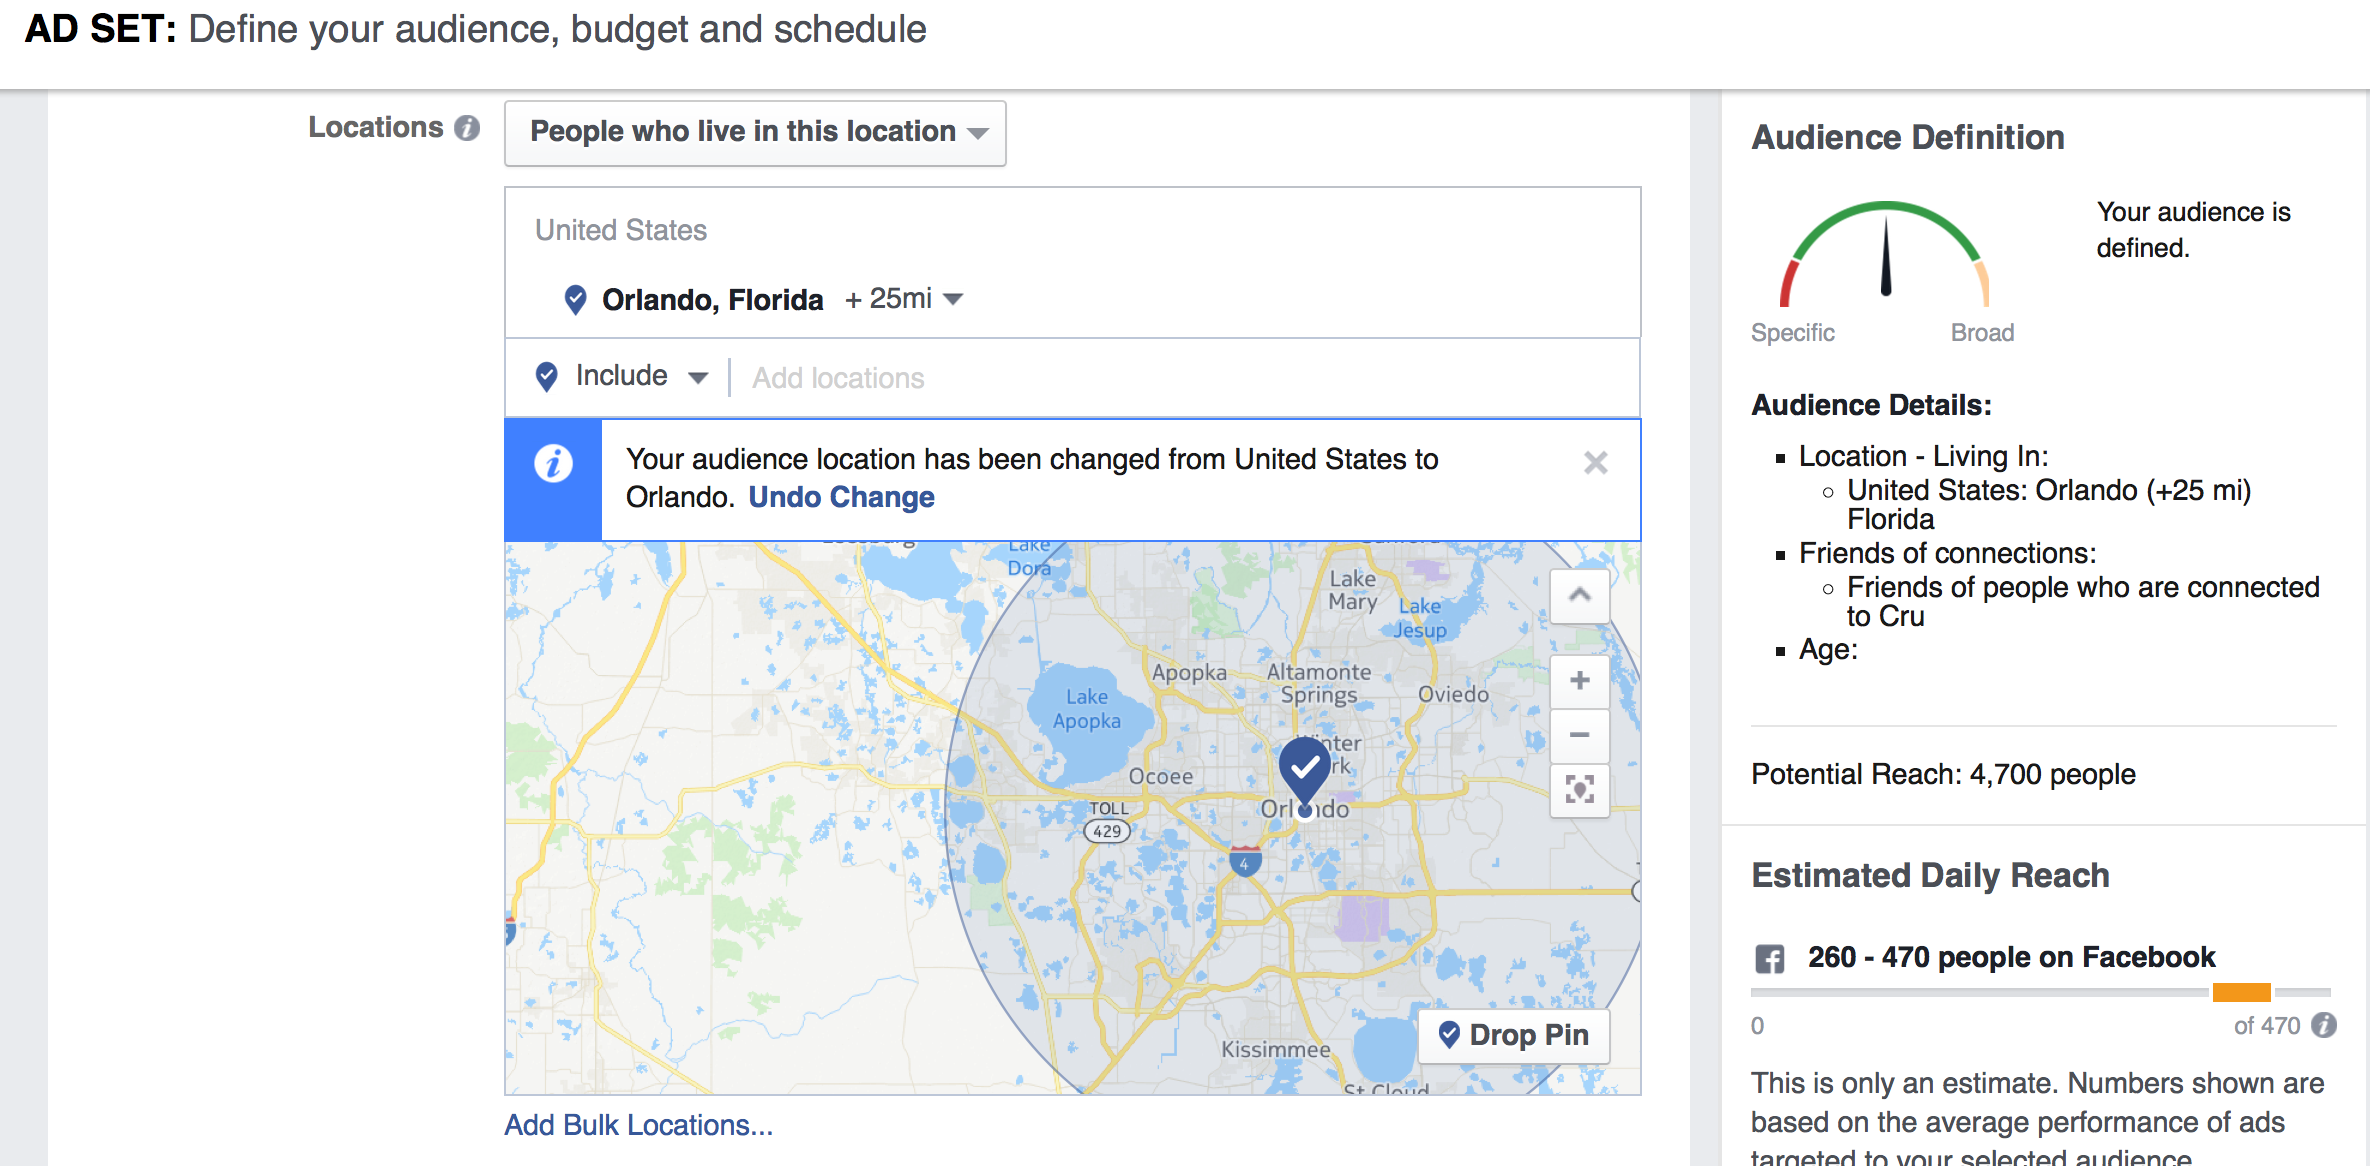
This next part is the reason Facebook Ads are as successful as they are. Choose who you want to see the post from the age, gender, geographic location even interests. The most specific you can be the better.
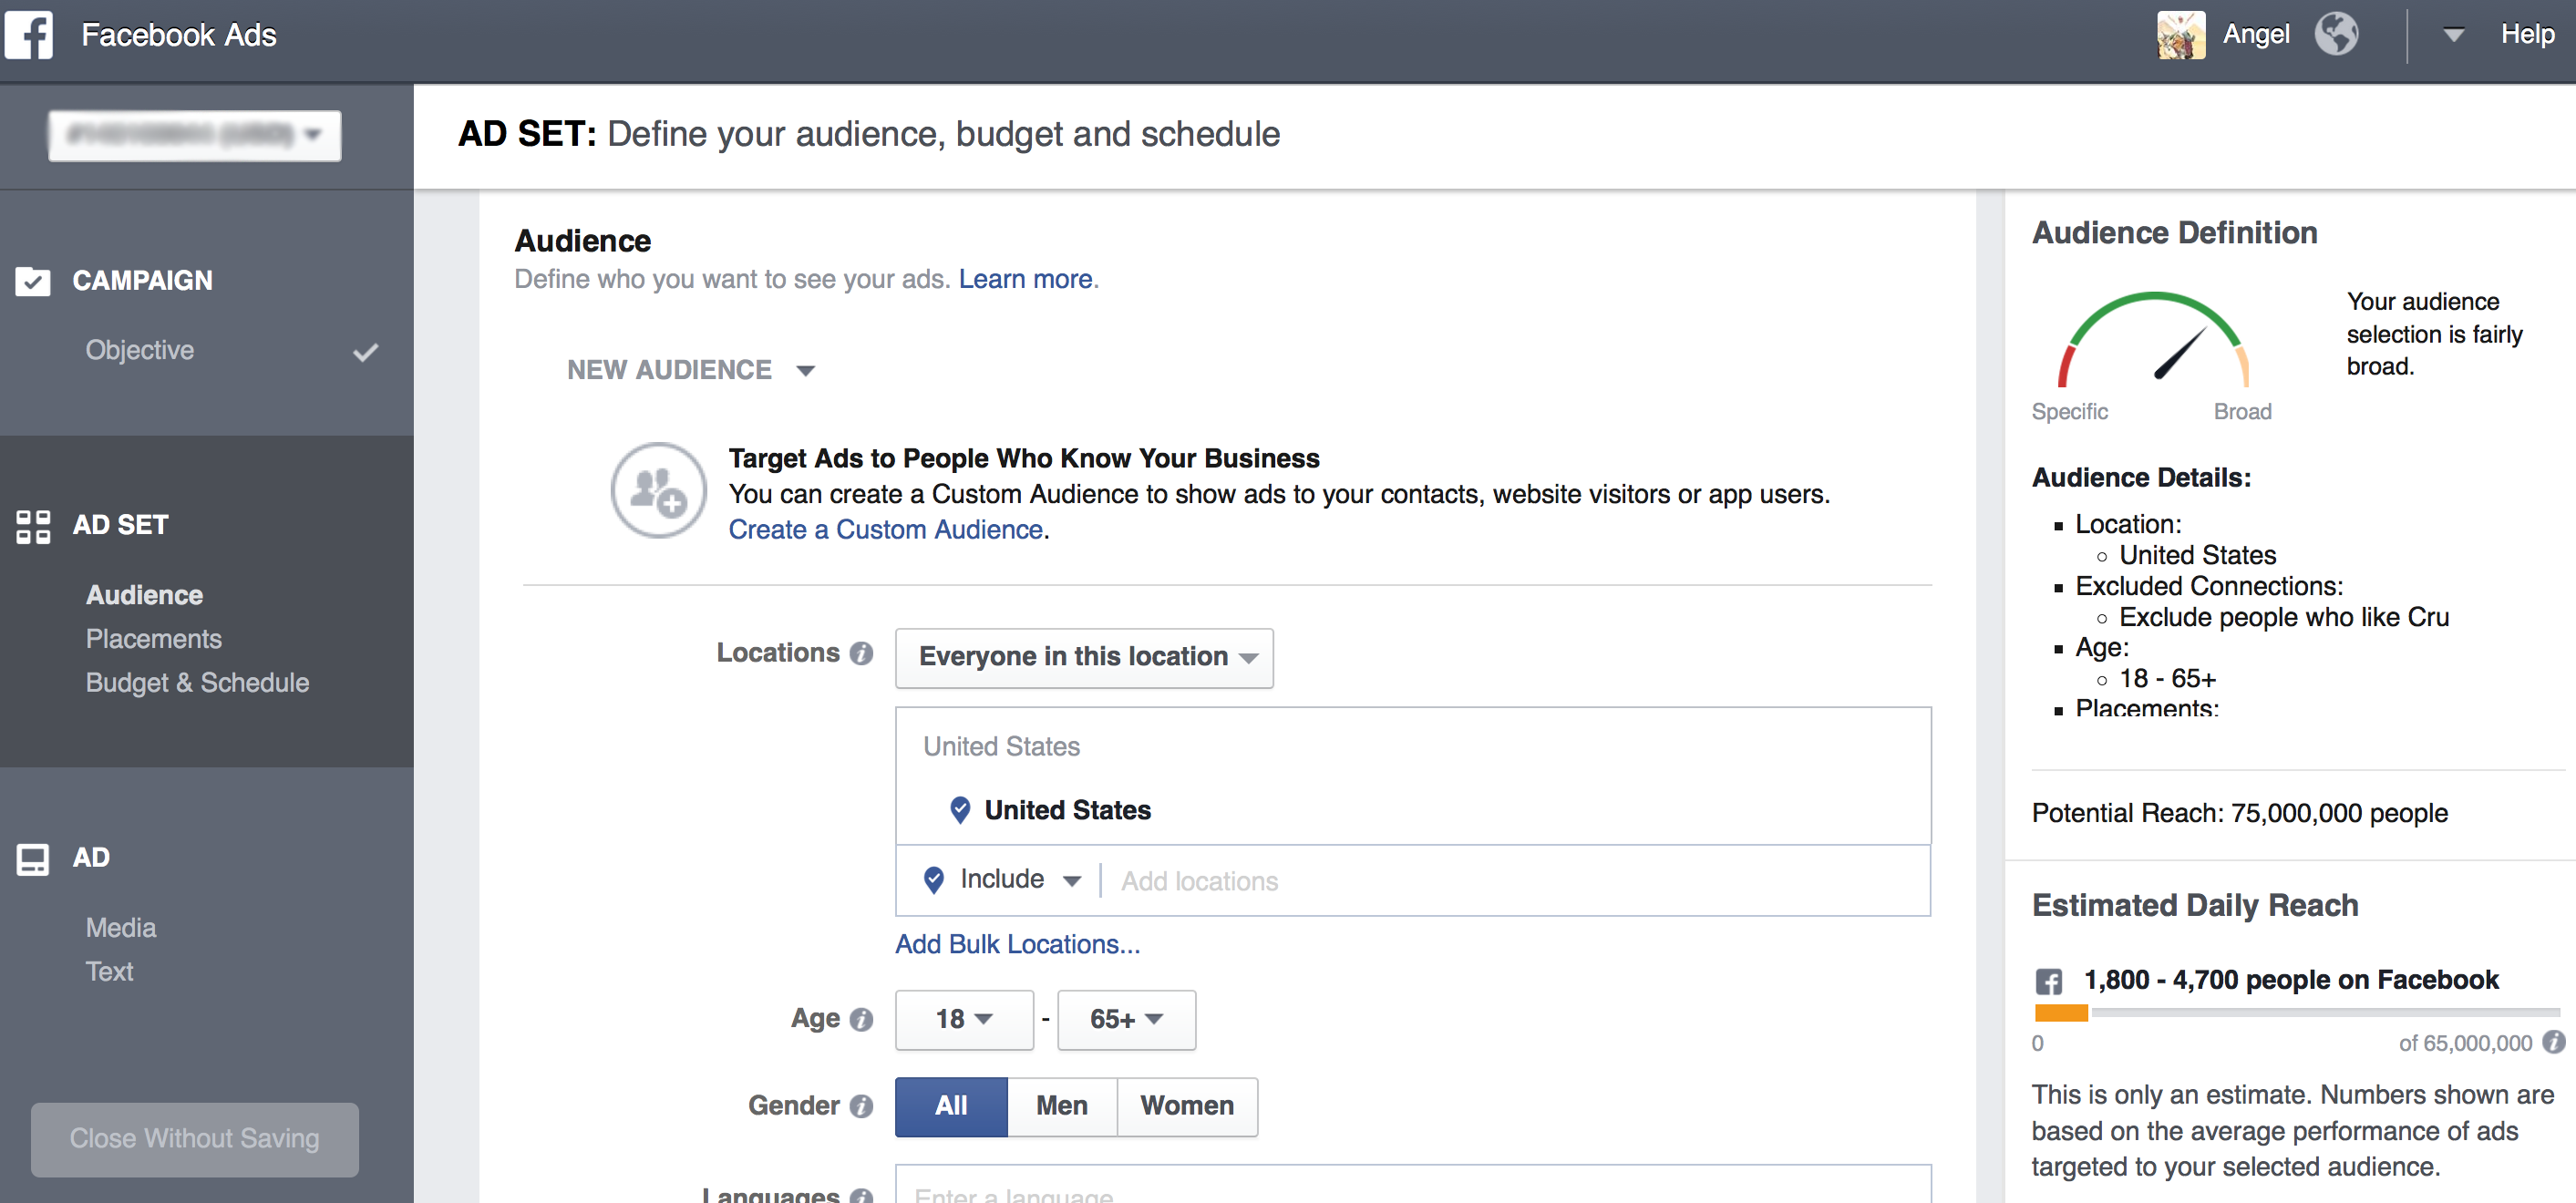
At this point, you may think adding enough key works to get a large projected audience reach is positive. On the contrary, if you can get that audience as specific as possible you have a better chance of being seen by the right person you want to see the posts, rather than in front of thousands who likely will scroll past your ad.
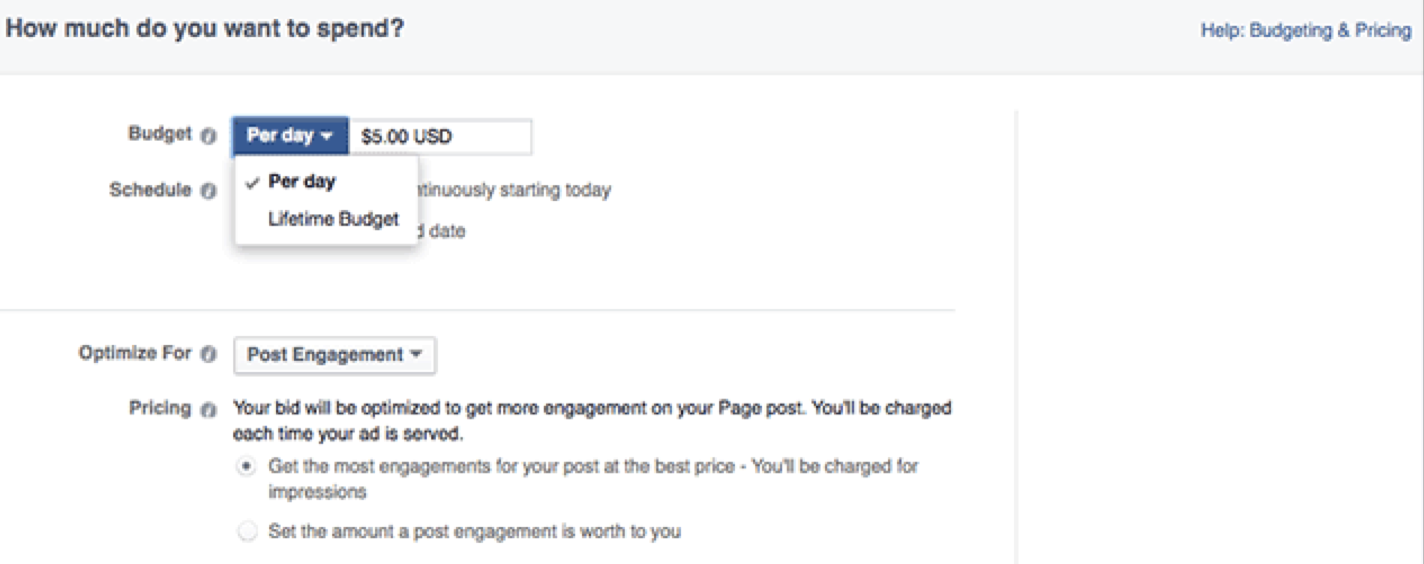
Set your budget and ad schedule. How much do you want to spend and over what amount of time. Research has suggested doing ads over one day rather than over several as that give you more opportunity throughout the day to be seen by your target audience rather than the off chance that your target audience will miss it during the few hours it is shared over a few days.
A good ballpark is $10 per day for every 1,000 people in your potential reach. But if you don’t have that amount to spend, you can bid lower. Your ad will be shown less, but it will still only be shown to people in your target audience. You can also deselect Desktop News Feed and Desktop Right Column placement to be slightly more cost efficient (only paying for Mobile News Feed ads).
Are you feeling unsure about whether to select a “Daily” or “Lifetime Budget”? This really is more about how you want the ad scheduled. If you don’t care when the ad runs, choose “Daily Budget.” You’ll do alright that way, but it’s better to tell Facebook what hours you want to show the ad i.e. the hours you think people in your target audience are likely to be checking Facebook on their devices. For that, you need to choose “Lifetime Budget.” Be careful because the default price for Lifetime Budget will always be $350. You need to manually change it to the total price you want to spend.
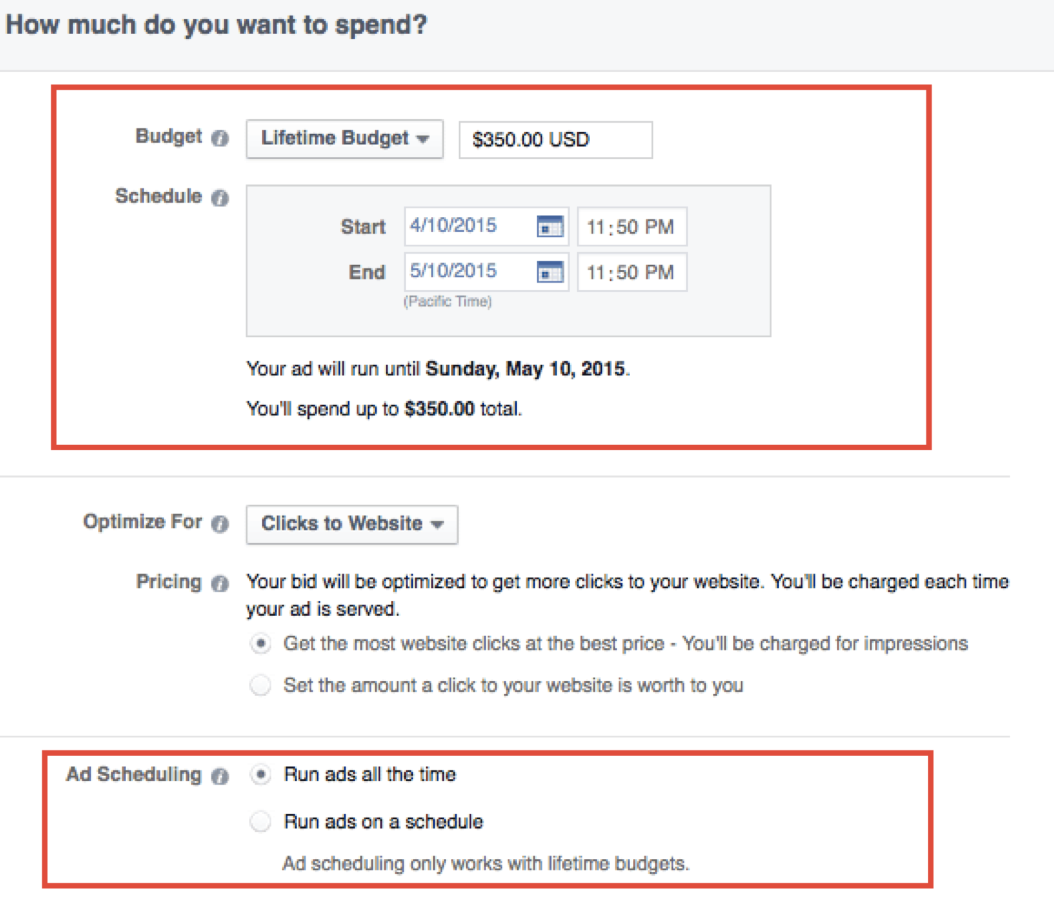
If you choose, you can set a manual bid by updating the “Optimize for” and “Pricing” sections with your preferences.
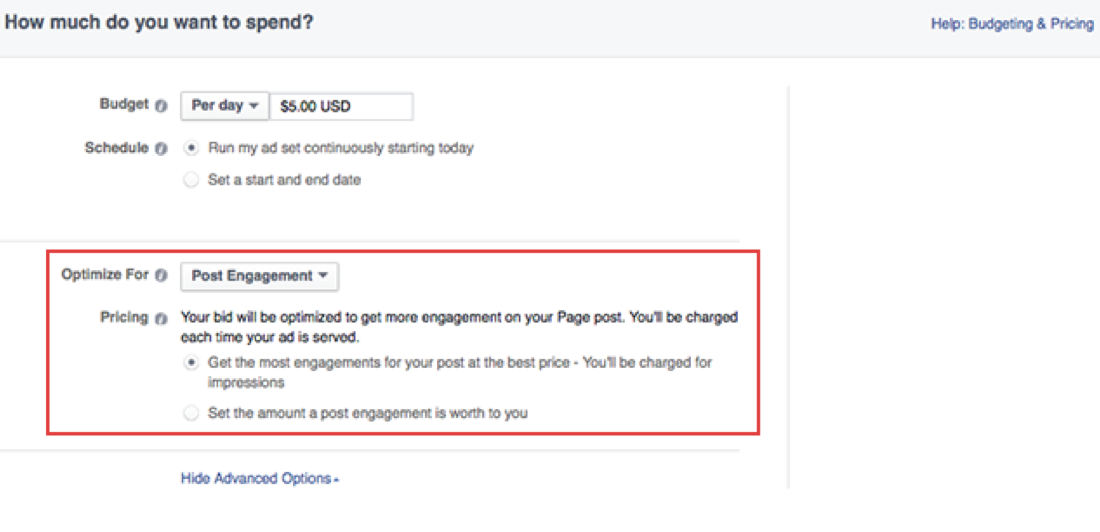
Add a name for your as set or use the default name that appears. My suggestion is to name the Ad Set based on demographics, “US - 18-22”, “Global - 45-65+” or “College Students”.

Choosing your images is a little bit tricky with Facebook ads. Learn more about choosing images for your ad.
Facebook offers design tips for Facebook ads and you can learn how to advertise successfully within Facebook’s policies.
Canva is a great free online tool to use for design details like adding text and changing the filter of your photo.
If you are creating a video ad, notes that viewership drops off drastically after 25 seconds. Make sure to select a good thumbnail picture, one that looks inviting and natural. You’ll also likely want to create a Call to Action, where you can ask people to “Learn More” and click on the next link.
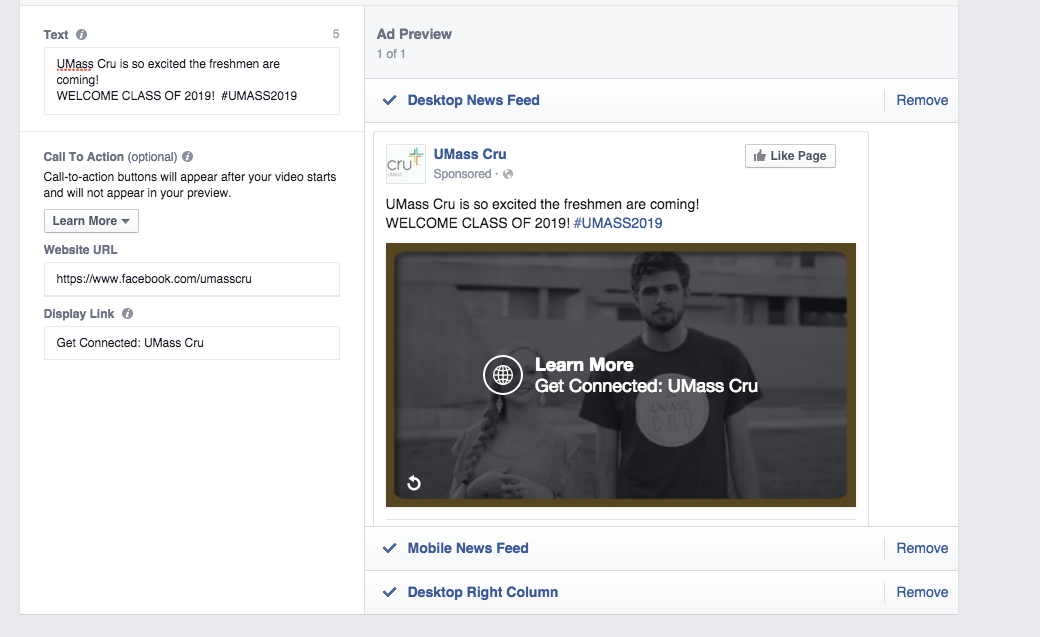
After choosing your images, you can add text and links to your ad. A character limit will appear when you edit your text to ensure your audience will be able to see your entire message. Get tips on writing content for your ad.
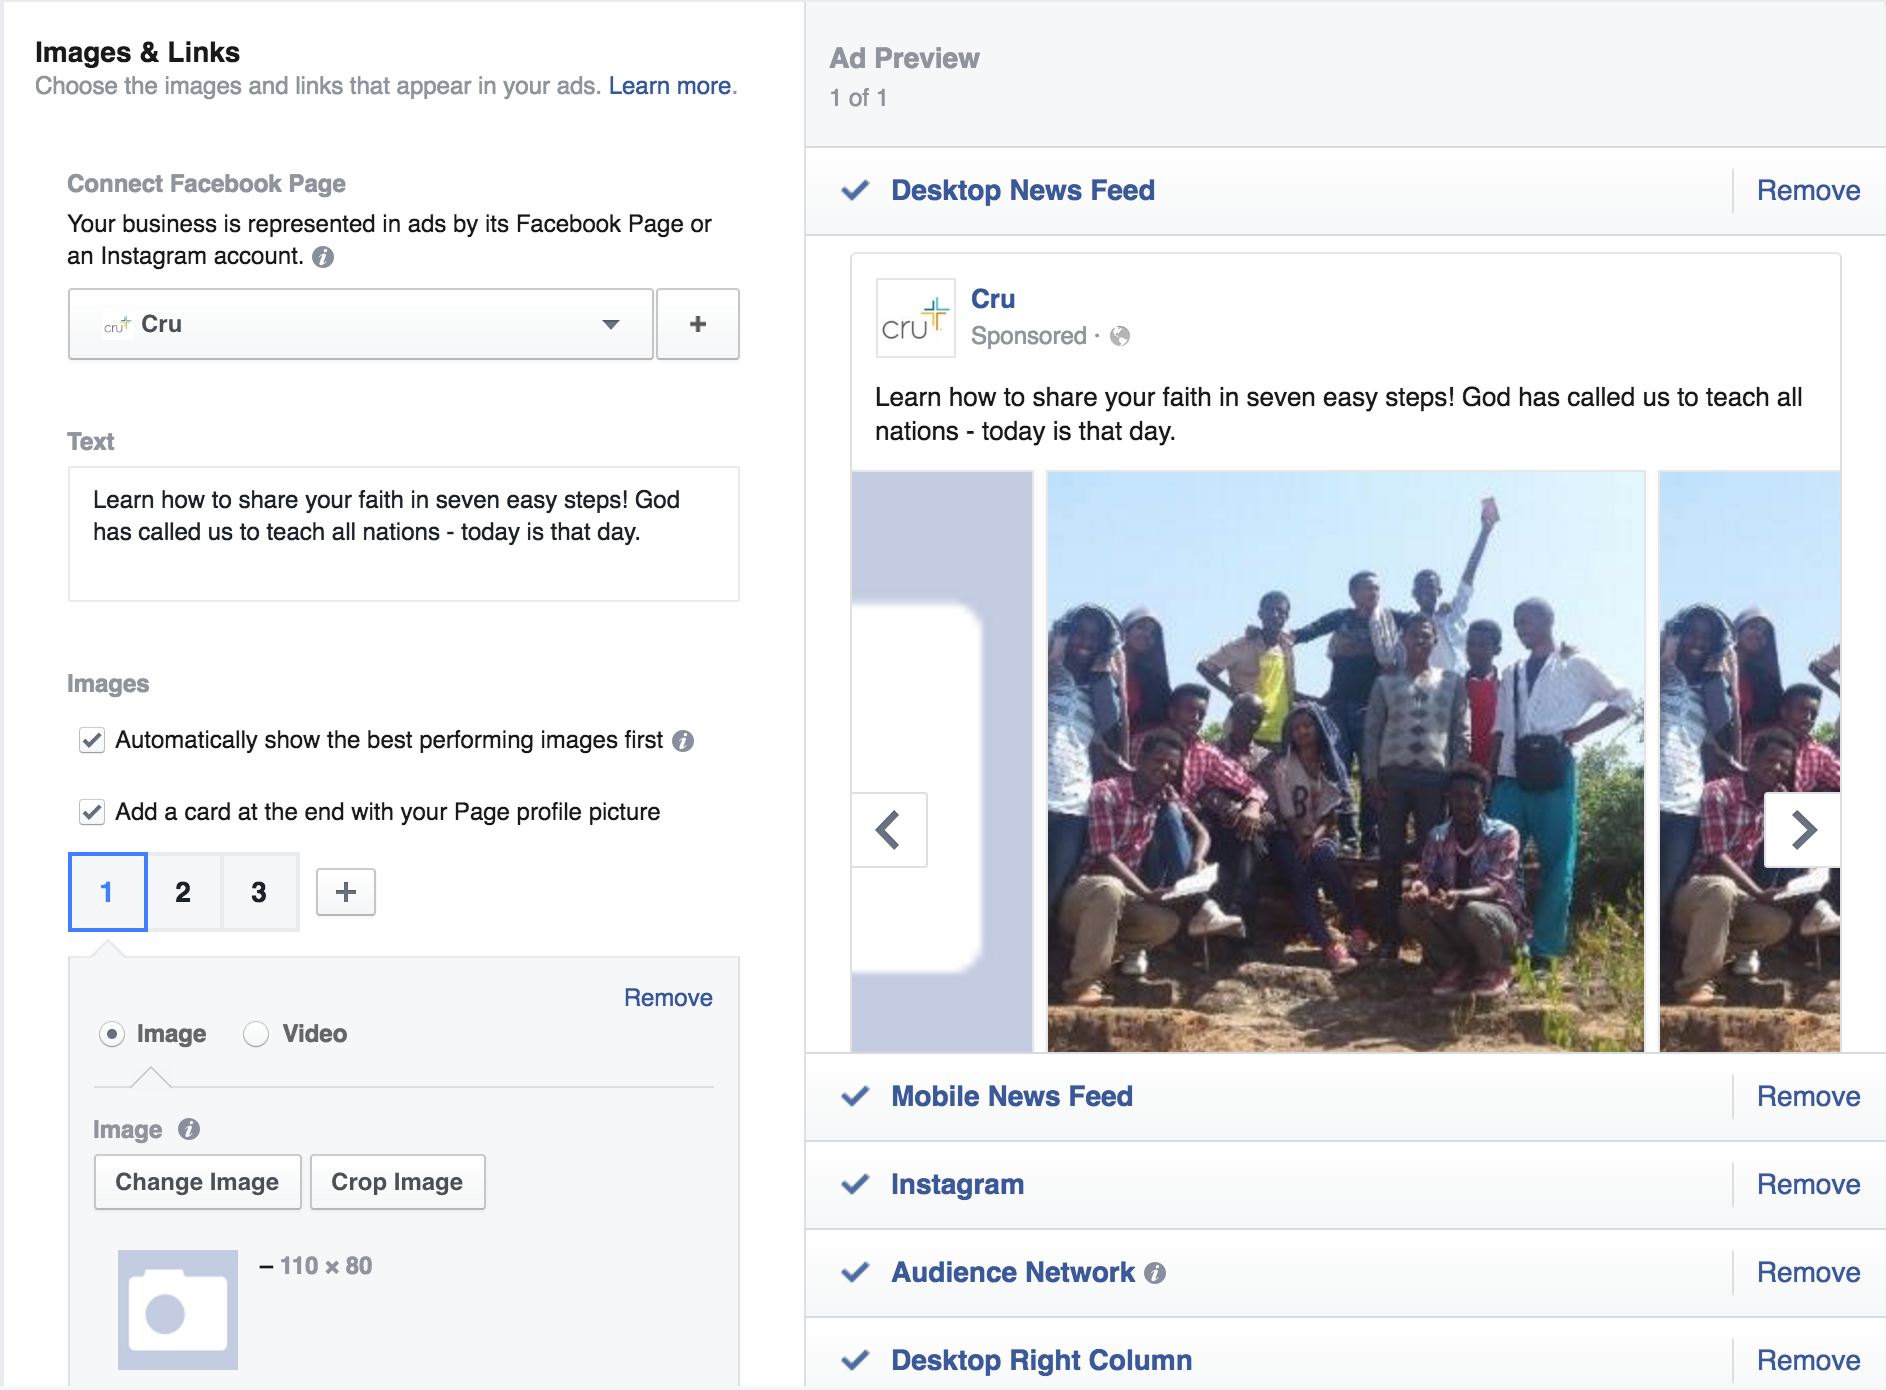
Now, you can also choose your ad placement, or where your ads appear on Facebook. Under “Ad Preview and Placements”, select the ad placements you want your ad to appear in. All of the ad placements will be auto-selected, but you can click “Remove” if there's a placement you don't want.
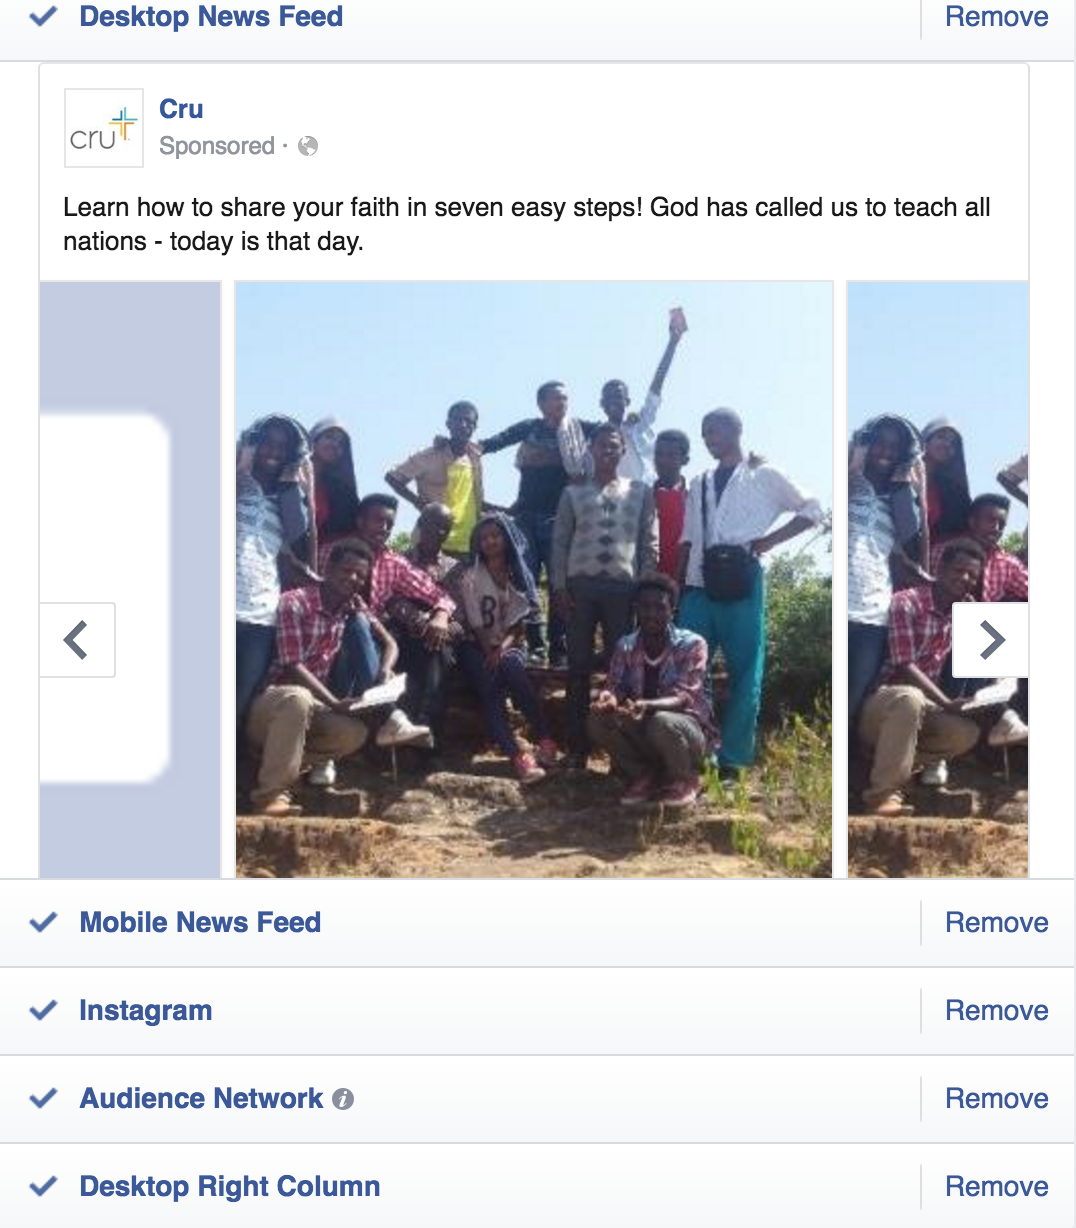
Note: If you're running ads that aren't associated with a Facebook Page, you'll only be able to run ads in the right column of Facebook.
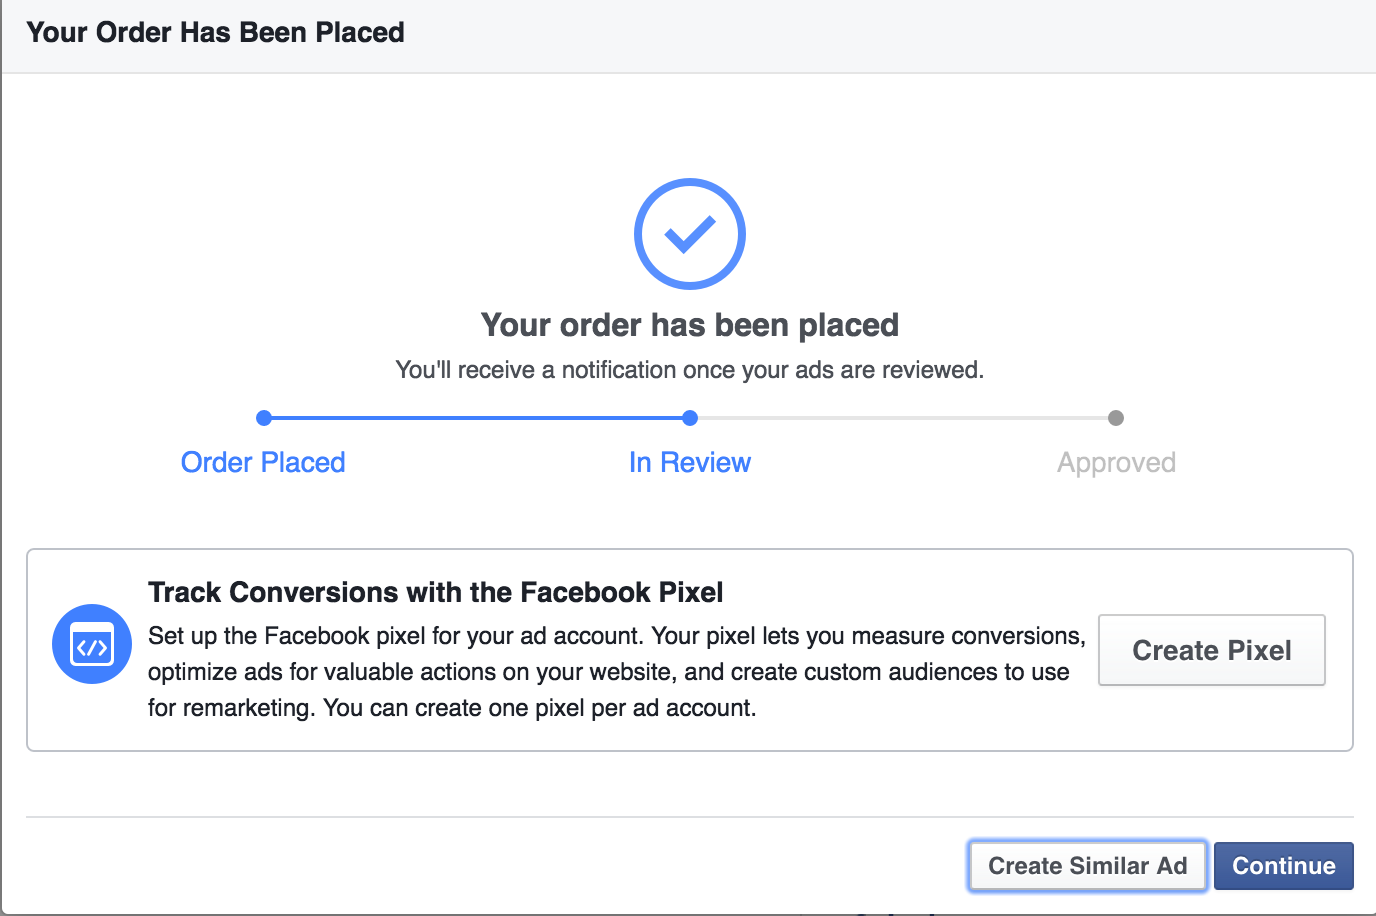
When you're ready, click “Place Order” at the bottom of ad creation to order your Facebook ads. The first time you place an order, you'll be asked to enter your payment information. Learn more about payment options for advertising.
Log into your personal Facebook account and select “Ads Manager”.

Once you click on “Ads Manager” you will be taken to your Facebook Ads page. Here you can manage existing ads, your account settings, billing and you have access to Power Editor and other tools like Audience Insights.

First you need to choose an objective for your ad. Go to “Create Campaign” and it will bring you to the campaign creation page.

Now you have to decide what your objective is. Are you wanting to publicize a particular post on your Fan Page? Do you want to send people to your website? What works with the campaign you are promoting online? Do you want to call people to action through a video?

You will be prompted to take the next steps by Ads Manager based on your selection.

This next part is the reason Facebook Ads are as successful as they are. Choose who you want to see the post from the age, gender, geographic location even interests. The most specific you can be the better.

At this point, you may think adding enough key works to get a large projected audience reach is positive. On the contrary, if you can get that audience as specific as possible you have a better chance of being seen by the right person you want to see the posts, rather than in front of thousands who likely will scroll past your ad.

Set your budget and ad schedule. How much do you want to spend and over what amount of time. Research has suggested doing ads over one day rather than over several as that give you more opportunity throughout the day to be seen by your target audience rather than the off chance that your target audience will miss it during the few hours it is shared over a few days.
A good ballpark is $10 per day for every 1,000 people in your potential reach. But if you don’t have that amount to spend, you can bid lower. Your ad will be shown less, but it will still only be shown to people in your target audience. You can also deselect Desktop News Feed and Desktop Right Column placement to be slightly more cost efficient (only paying for Mobile News Feed ads).
Are you feeling unsure about whether to select a “Daily” or “Lifetime Budget”? This really is more about how you want the ad scheduled. If you don’t care when the ad runs, choose “Daily Budget.” You’ll do alright that way, but it’s better to tell Facebook what hours you want to show the ad i.e. the hours you think people in your target audience are likely to be checking Facebook on their devices. For that, you need to choose “Lifetime Budget.” Be careful because the default price for Lifetime Budget will always be $350. You need to manually change it to the total price you want to spend.


If you choose, you can set a manual bid by updating the “Optimize for” and “Pricing” sections with your preferences.

Add a name for your as set or use the default name that appears. My suggestion is to name the Ad Set based on demographics, “US - 18-22”, “Global - 45-65+” or “College Students”.

Choosing your images is a little bit tricky with Facebook ads. Learn more about choosing images for your ad.
Facebook offers design tips for Facebook ads and you can learn how to advertise successfully within Facebook’s policies.
Canva is a great free online tool to use for design details like adding text and changing the filter of your photo.
If you are creating a video ad, notes that viewership drops off drastically after 25 seconds. Make sure to select a good thumbnail picture, one that looks inviting and natural. You’ll also likely want to create a Call to Action, where you can ask people to “Learn More” and click on the next link.

After choosing your images, you can add text and links to your ad. A character limit will appear when you edit your text to ensure your audience will be able to see your entire message. Get tips on writing content for your ad.

Now, you can also choose your ad placement, or where your ads appear on Facebook. Under “Ad Preview and Placements”, select the ad placements you want your ad to appear in. All of the ad placements will be auto-selected, but you can click “Remove” if there's a placement you don't want.

Note: If you're running ads that aren't associated with a Facebook Page, you'll only be able to run ads in the right column of Facebook.
When you're ready, click “Place Order” at the bottom of ad creation to order your Facebook ads. The first time you place an order, you'll be asked to enter your payment information. Learn more about payment options for advertising.

©2025 LMT. All Rights Reserved.